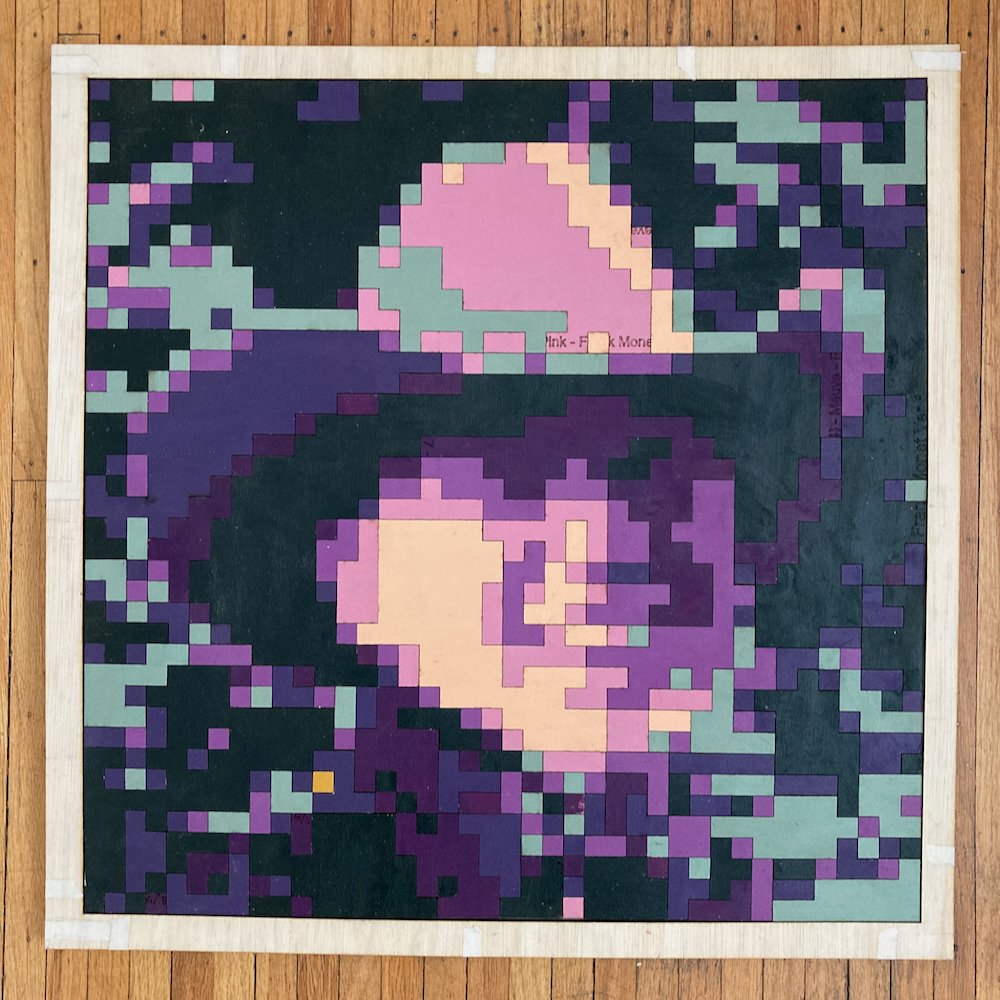
I've been exploring the art of mosaic-making over the past two years. This second 20” × 20” piece is based on a photograph of a friend wearing a cowboy hat.
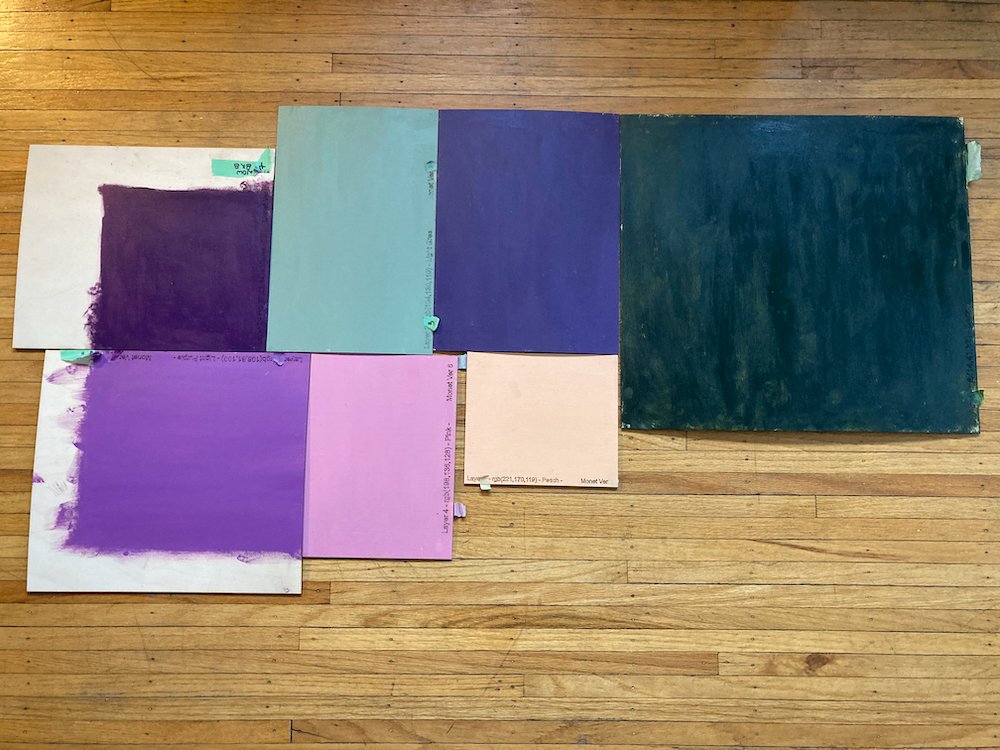
The colour palette draws from hues Monet used in his garden paintings. Photo editing and colour selection took time—seven versions were tested before I arrived at the artistic result I was after.

My process, as usual, is fairly technical. It took about four months to write a custom application that converts photographs into mosaics using a chosen set of colours.
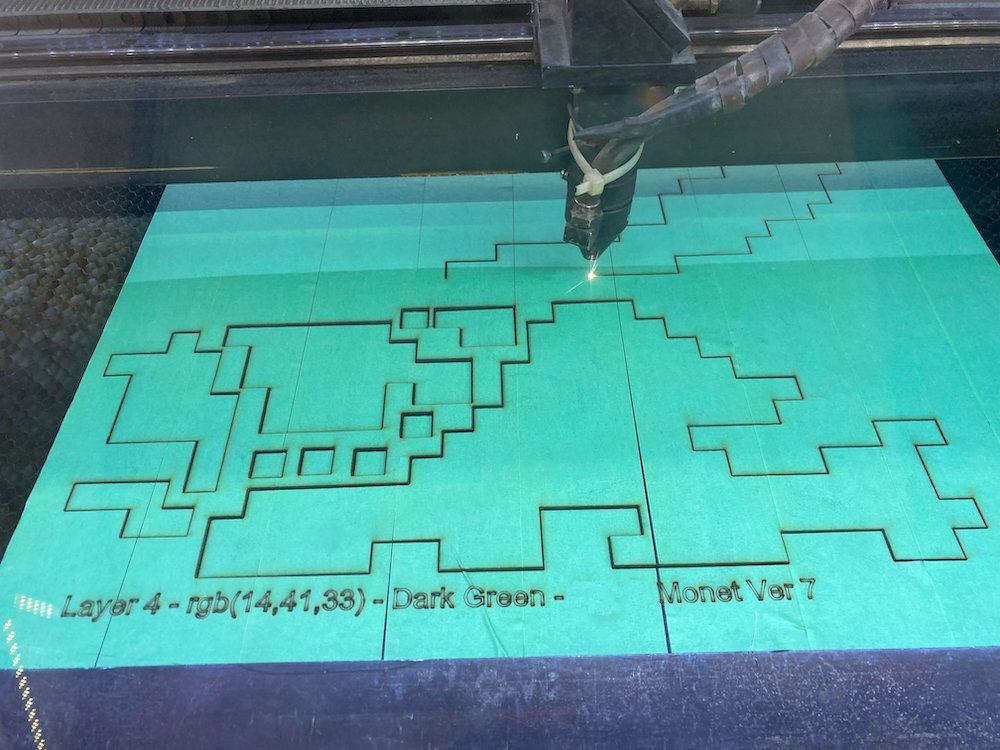
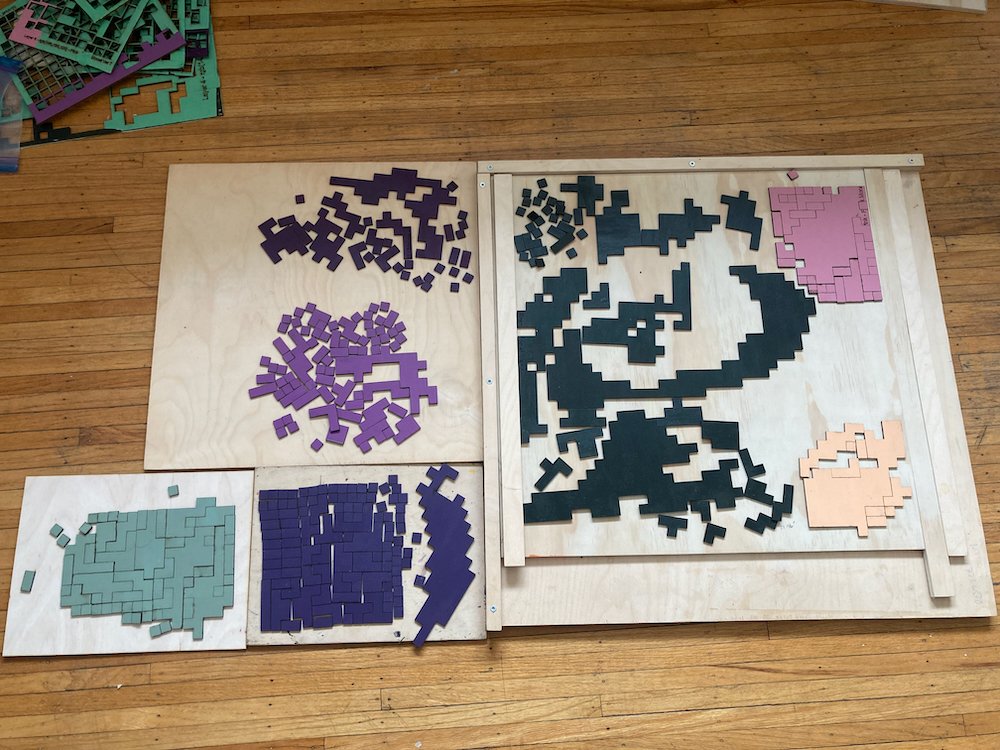
Hand-assembling a 1,600- or 3,600-piece mosaic is time-consuming (40+ hours), so I modified my application to consolidate contiguous tiles of the same colour into single, shaped “tiles.” This greatly reduces assembly time.
Each 1/8" thick Baltic birch panel is painted with acrylic in one of the selected mosaic colours. The shaped tiles are then laser-cut from these panels. Before cutting, each panel is covered in green tape to prevent smoke damage from the laser; the tape is peeled off after cutting.
Next comes the hand assembly. Each tile is glued in place on the wooden base using wood glue. The full assembly process takes place over about three days.

Assembly of Mosaic.
Included here are some of the more “boring” technical details—for those who are curious. I used the development of my Mosaic Photo Application as an opportunity to learn a new programming language called Rust. It’s known for being fast and powerful, but also challenging to learn. It took me about four months before I had anything useful. If I had used Python—a language I already knew—the process would have been much faster.
To create contiguous tiles, I had to dive into a few computer science concepts: edge tracing, bin packing, depth-first search, and the SVG (scalable vector graphics) file format. That part of the project added another three months of development time.